Prerequisites
- A user account with sudo privileges
- Access to a command line/terminal window (Ctrl-Alt-T)
Steps For Installing Anaconda
Our tutorial on installing Anaconda on Ubuntu 18.04 or Ubuntu 20.04 includes downloading the latest version, verifying data integrity of the installer, and running the bash install script.
Step 1: Update Local Package Manager
Start by updating the local package manager. Open a terminal window and enter the following:
sudo apt-get updateIf your system doesn’t have curl, install it by entering:
sudo apt-get install curlStep 2: Download the Latest Version of Anaconda
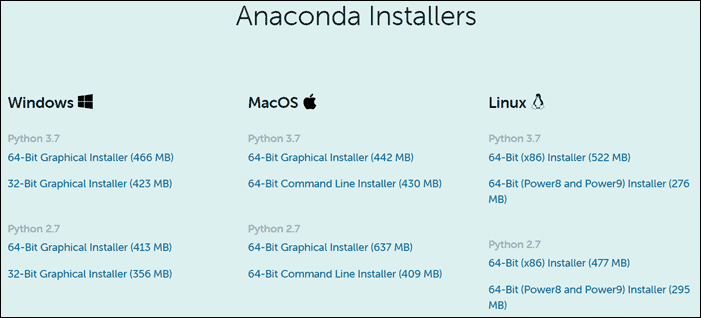
At the time this article was written, the latest version of Anaconda is 2020.02. Check the developer’s download page to view the newest version.
Note the URL and use it to download the correct version.
Switch to the /tmp directory and use curl to download the installer using your command terminal:
cd /tmpcurl –O https://repo.anaconda.com/archive/Anaconda3-2020.02-Linux-x86_64.shThis version is designed for Python 3.7. If you are using Python 2.7, use the appropriate URL.
Step 3: Verify the Download Checksum
Checksum is a security tool used to verify the authenticity and integrity of a downloaded script.
Enter the following:
sha256sum Anaconda3–2020.02–Linux–x86_64.shYour system will display a series of letters and numbers:
69581cf739365ec7fb95608eef694ba959d7d33b36eb961953f2b82cb25bdf5a Anaconda3-2019.07-Linux-x86_64.shCompare those to the appropriate checksum (or hash) in the Anaconda documentation. If you have chosen a different version, make sure to check the documentation for that version’s checksum.
Step 4: Run Anaconda Installation Script
The Anaconda installer is a bash script. To run the installation script, use the command:
bash Anaconda3-2020.02-Linux-x86_64.shA license agreement will appear. Use the Enter key to review the agreement.

At the bottom, type yes to agree to the terms.
The installer will prompt you to accept the default location, or install to a different location. Use the default path unless you have a specific need to change it. (You may cancel the installation here if needed.)

The installation will finish. After sucessful installation, the following will appear:
installation finished.
Do you wish the installer to prepend the Anaconda3 install location
to PATH in your /home/user/.bashrc ? [yes|no]
This determines if you want to use the conda command without changing the directory. Type yes and hit enter, unless you have a specific need to do otherwise. The system will respond as follows:
Appending source /home/user/anaconda3/bin/activate to /home/linux4one/.bashrc
A backup will be made to: /home/user/.bashrc-anaconda3.bak
For this change to become active, you have to open a new terminal.
Thank you for installing Anaconda3!
(Optional) Step 5: Install VSCode Editor
The system will ask if you want to install Microsoft Visual Studio Code Editor. It will display the following:
Anaconda is partnered with Microsoft! Microsoft VSCode is a streamlined
code editor with support for development operations like debugging, task
running and version control.
To install Visual Studio Code, you will need:
    - Administrator Privileges
    - Internet connectivity
Visual Studio Code License: https://code.visualstudio.com/license
Do you wish to proceed with the installation of Microsoft VSCode? [yes|no]
Decide by typing yes or no to continue.
Step 6: Activate and Test Installation
Once finished, activate the installation by entering:
source ~/.bashrcUse the conda command to test the installation:
conda infoThe system should display a list of data similar to:
active environment : None
    user config file : /home/user/.condarc
populated config files :
        conda version : 4.5.4
    conda-build version : 3.10.5
        python version : 3.7.0.final.0
    base environment : /home/user/anaconda3  (writable)
        channel URLs : https://repo.anaconda.com/pkgs/main/linux-64
                        https://repo.anaconda.com/pkgs/main/noarch
                        https://repo.anaconda.com/pkgs/free/linux-64
                        https://repo.anaconda.com/pkgs/free/noarch
                        https://repo.anaconda.com/pkgs/r/linux-64
                        https://repo.anaconda.com/pkgs/r/noarch
                        https://repo.anaconda.com/pkgs/pro/linux-64
                        https://repo.anaconda.com/pkgs/pro/noarch
        package cache : /home/user/anaconda3/pkgs
                        /home/user/.conda/pkgs
    envs directories : /home/user/anaconda3/envs
                        /home/user/.conda/envs
            platform : linux-64
            user-agent : conda/4.5.4 requests/2.18.4 CPython/3.6.5 Linux/4.15.0-22-generic ubuntu/18.04 glibc/2.27
                UID:GID : 1000:1000
            netrc file : None
        offline mode : False
How to Update Anaconda on Ubuntu
To update Anaconda on Ubuntu, start by updating the conda utility:
conda update condaNext, run the Anaconda package update command:
conda update anacondaCreate and Activate Anaconda Environments
Create a Python 3 environment named test_environment by entering the following:
conda create ––name test_environment python=3Activate this environment:
conda activate test_environmentThe command prompt will change. This indicates that you are now in a shell environment using Python 3. You can now work in this environment.